There’s something magical about fall—the crisp air, colorful leaves, and the comforting smell of baked treats filling the kitchen. For me, this season always brings back memories of rolling dough with my kids, Lily and Jonah, and decorating cookies that looked far from perfect but always tasted like love. That’s the beauty of fall royal icing cookies: they don’t need to be flawless to bring joy. This recipe is simple, family-friendly, and absolutely doable even if you’re new to cookie decorating. Grab your favorite cutters, some cozy fall colors, and let’s bake something festive together.
Table of Contents
The Story & Intro to Fall Royal Icing Cookies
Why Fall Cookies Feel Special
Fall baking has its own rhythm—pumpkin spice in the air, apples stacked on the counter, and afternoons when the oven feels like the heart of the home. I started making fall royal icing cookies because I wanted my kids to have more than just store-bought sweets. At first, my cookies spread into odd shapes, and my icing was a little too runny. But soon, we discovered the fun of baking cut-out cookies, much like the ones I first tried when testing a batch of fall sugar cookies. What began as a messy kitchen project turned into one of our favorite fall traditions—cookies that tell the story of the season with every bite.
First-Time Baking Confidence
Scrolling online, I used to see beautifully decorated royal icing cookies and think, “I could never do that.” But I learned that success starts with the right dough and a simple icing recipe. Decorating is less about perfection and more about enjoying the process. One of my earliest wins in the kitchen came not from cookies but from a batch of pumpkin scones that showed me even rustic results could feel special. Cookies work the same way—whether you pipe little pumpkins or swirl marbled leaves, your creations will feel festive. By the end of this guide, you’ll see just how easy it is to bake cookies that look beautiful and taste even better.
Baking the Perfect Fall Sugar Cookies
Simple Dough for Royal Icing
Every beautiful fall royal icing cookie starts with the right sugar cookie dough. The goal is a cookie that tastes buttery and delicious but also holds its shape when baked. For that, you need a no-spread sugar cookie recipe—soft enough to bite into yet sturdy enough for layers of icing. Start by creaming butter and sugar until fluffy, then add eggs and vanilla. Mixing in flour slowly keeps the dough tender. Once made, chill the dough for at least 30 minutes. This step prevents spreading and makes cutting shapes easier, ensuring your pumpkins and leaves look as crisp as the ones you’ll soon decorate. If you enjoy experimenting, try pairing this dough with seasonal favorites like pumpkin pie dip for a festive fall dessert table.
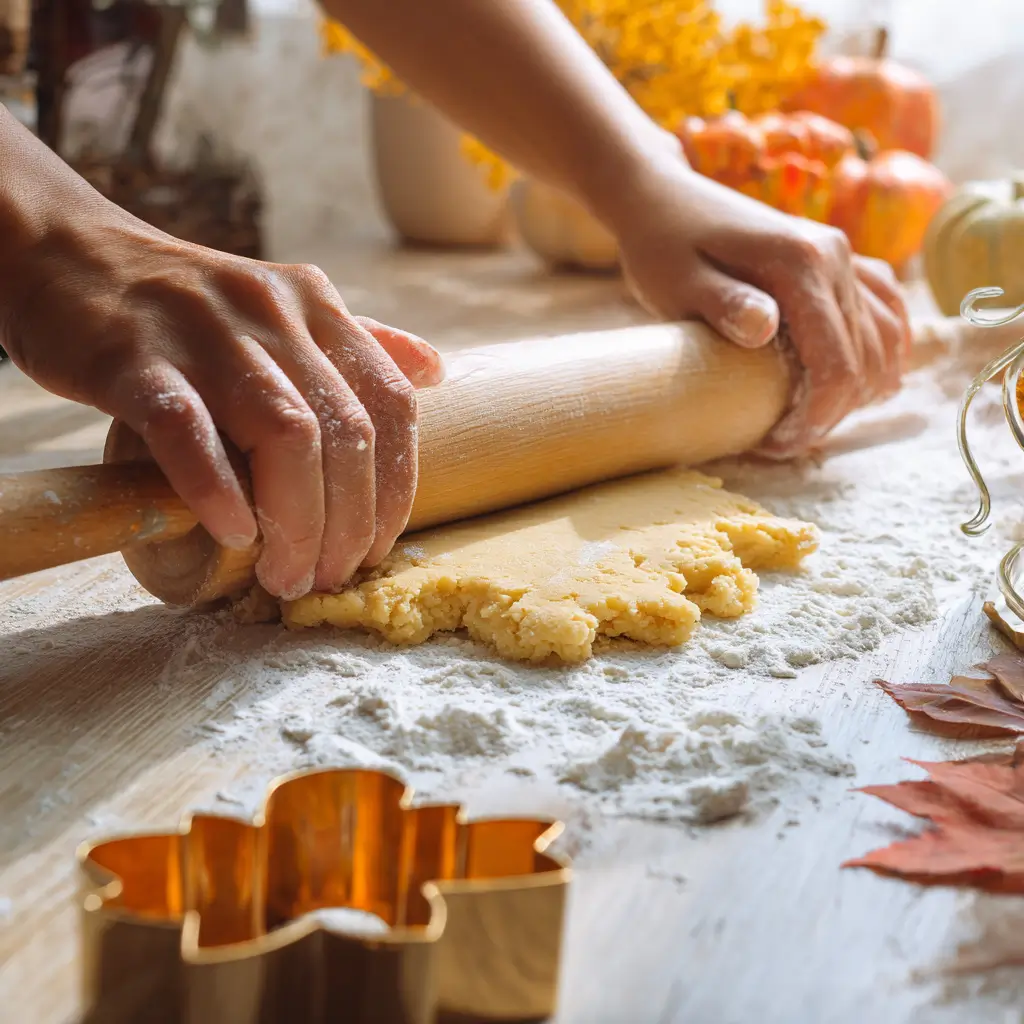
Shaping & Cutting Fall Designs
One of the most fun parts of baking is choosing the shapes. Leaf, pumpkin, and acorn cookie cutters bring the season to life. Roll the dough evenly—about ¼ inch thick—to keep baking times consistent. Dip your cutters in flour to prevent sticking, and press firmly for sharp edges. Once cut, place the cookies on a parchment-lined baking sheet and pop them back in the fridge for 10 minutes before baking. This quick chill helps them bake up with neat edges. As they cool, you’ll see they’re the perfect canvas for icing. For another fall cookie option, pumpkin cheesecake truffles make a sweet addition to any autumn cookie platter.
Making & Coloring Royal Icing
Foolproof Royal Icing Recipe
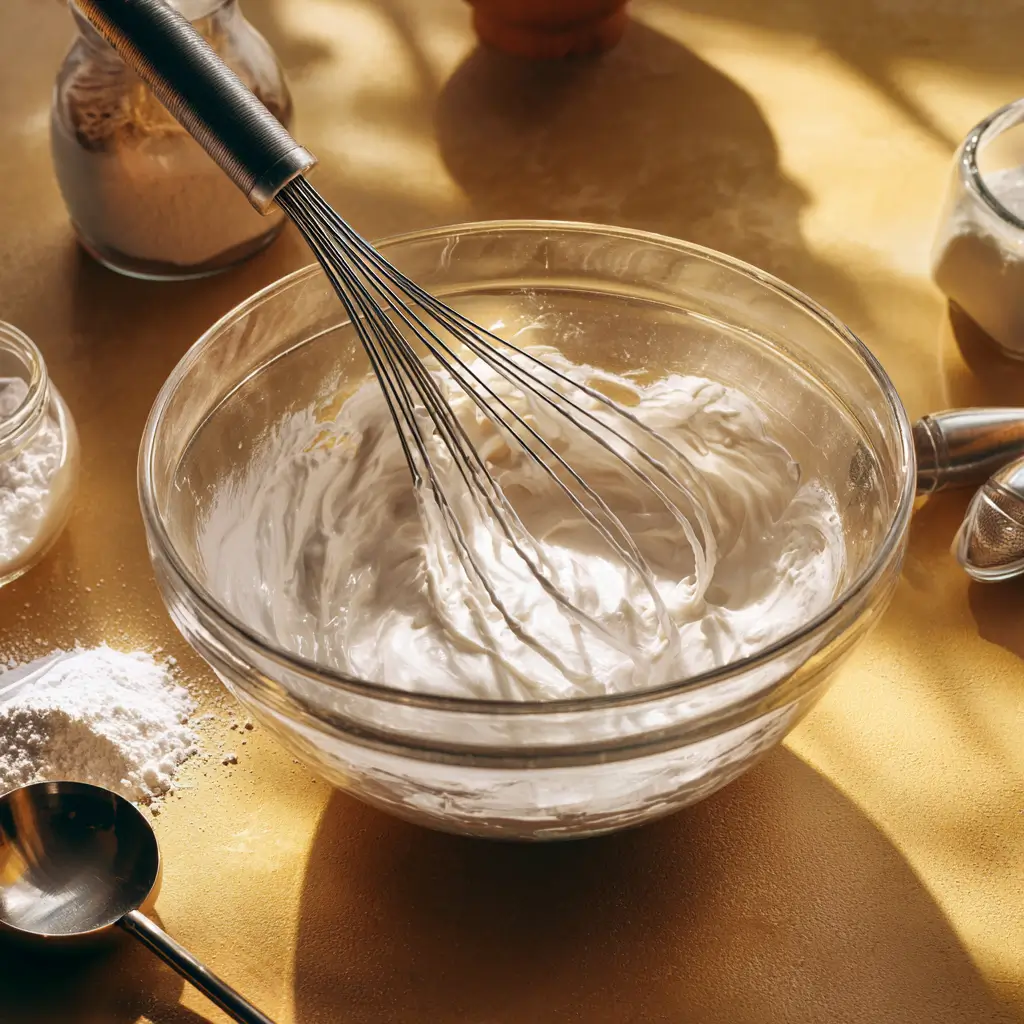
Once your cookies have cooled, it’s time to make the icing that brings them to life. A classic royal icing recipe uses just a few ingredients—powdered sugar, meringue powder (or pasteurized egg whites), water, and a splash of vanilla for flavor. Start by mixing the sugar and meringue powder, then slowly add water until the icing forms stiff peaks. From there, you can adjust the consistency: a thicker icing works for outlining, while a thinner version is perfect for flooding the cookie surface. Keep the icing covered with a damp towel when not in use so it doesn’t dry out. If you want another seasonal treat that’s easy to whip up, try my apple cinnamon blondies, which pair perfectly with a plate of cookies.
Fall-Inspired Colors
One of the most enjoyable steps in decorating fall royal icing cookies is mixing warm seasonal shades. Start with gel food coloring, since it won’t thin your icing like liquid colors. For autumn tones, think pumpkin orange, deep cranberry red, golden yellow, and muted forest green. Add color gradually, mixing until you reach your desired shade. For variation, you can swirl two tones together to mimic the marbled look of fallen leaves. Small squeeze bottles or piping bags make handling the icing easy, especially for beginners. If you love cozy seasonal flavors, you might also enjoy apple cider whoopie pies, which share that same comforting fall vibe.
Decorating Fall Royal Icing Cookies
Easy Decorating Techniques
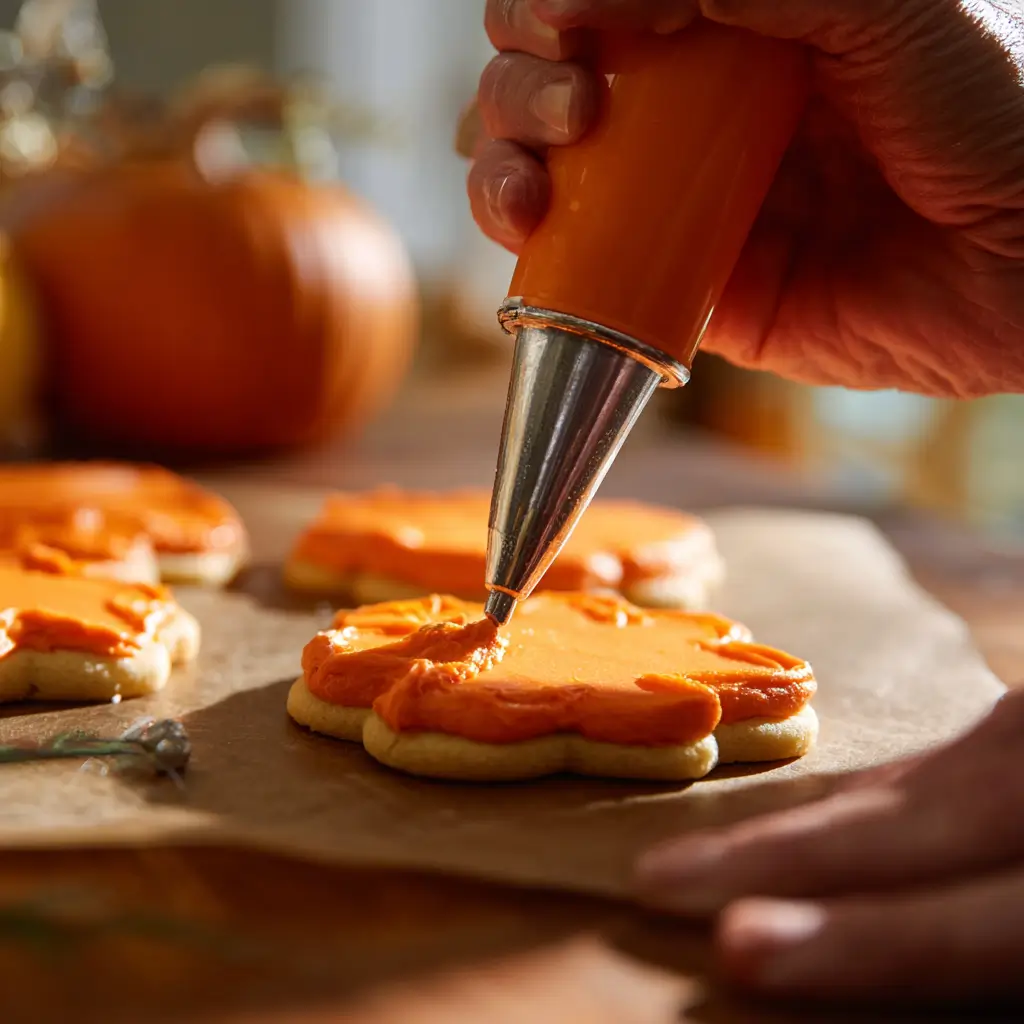
Now comes the fun part—decorating your cookies! Start by outlining each cookie with a slightly thicker royal icing to create a border, then fill in the center with thinner icing (a process called “flooding”). Use a toothpick to gently spread the icing to the edges and pop any air bubbles. For wet-on-wet designs, drop dots of one color into freshly flooded icing and drag a toothpick through them to create patterns like swirls or hearts. For more texture, let the first layer dry before piping details on top, like pumpkin vines or leaf veins. If you’ve enjoyed these cookies, you’ll also love pumpkin chocolate chip cookies, which offer a soft and chewy fall flavor without the icing step.
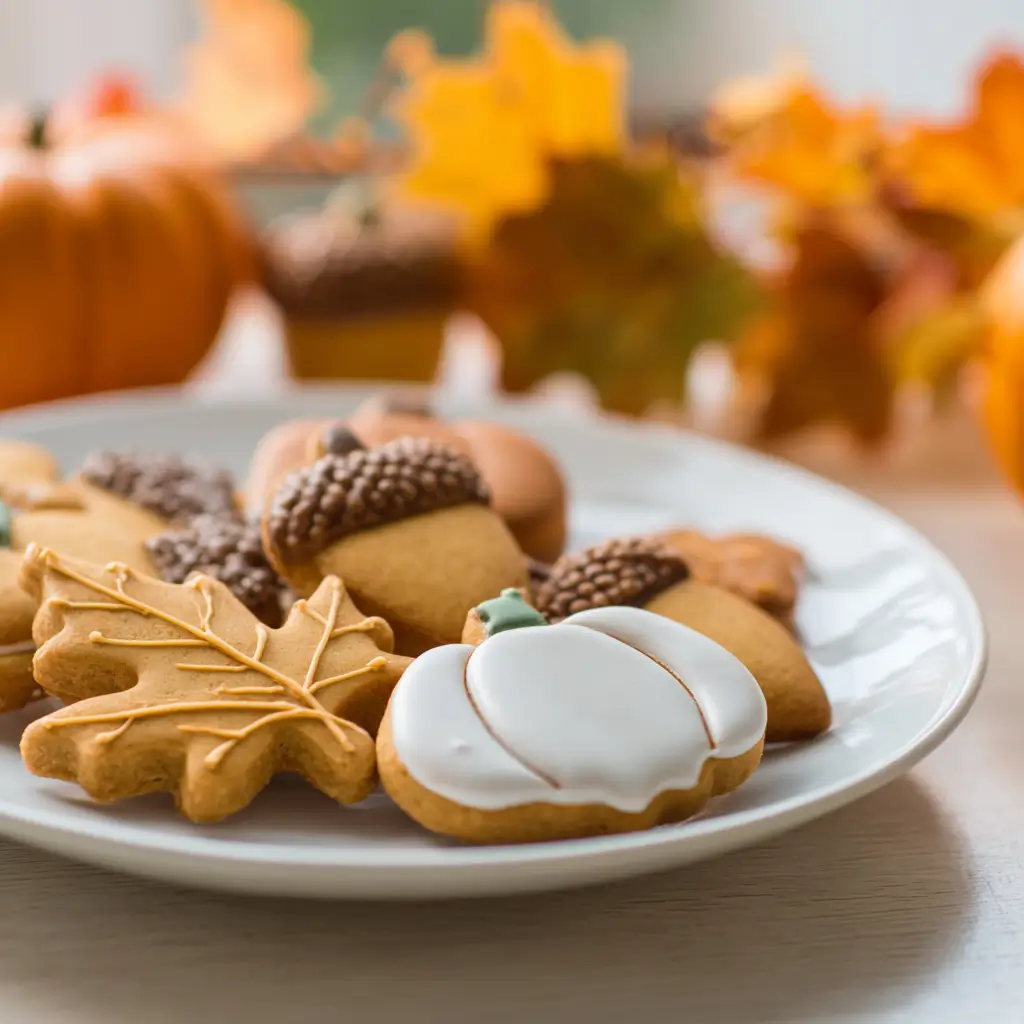
Creative Fall Designs
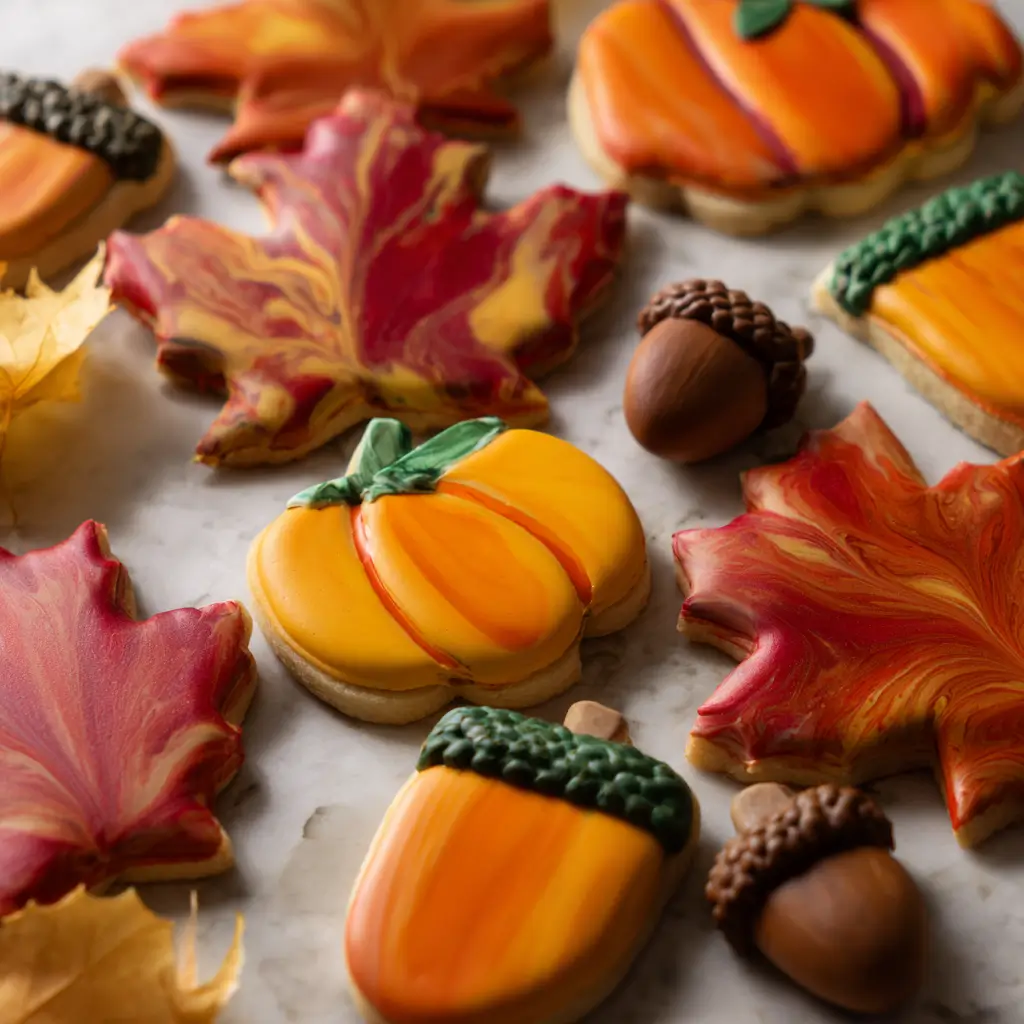
The beauty of fall royal icing cookies is how versatile they are. Use warm oranges and browns to decorate pumpkins, add tiny green swirls for vines, and pipe acorns with textured tops. Maple leaves look beautiful with marbled icing—just swirl red, yellow, and orange together for a lifelike effect. You can even try plaid patterns on square cookies for a cozy flannel look. Don’t stress about perfection; every cookie has its own charm, and kids especially love helping with the designs. For another autumn-inspired dessert, caramel apple cider cookies bring all the same cozy flavors in a different, gooey package.
Frequently Asked Questions About Fall Royal Icing Cookies
How long do fall royal icing cookies last?
Decorated royal icing cookies can stay fresh for up to 2 weeks when stored in an airtight container at room temperature. For best results, keep them in a cool, dry place away from direct sunlight. The icing actually helps seal in the cookie’s freshness.
Can I freeze decorated royal icing cookies?
Yes! Once the icing has completely dried, place the cookies in a single layer, separated by parchment paper, inside an airtight container. They can be frozen for up to 3 months. When ready to eat, let them thaw at room temperature before unstacking to prevent smudging.
How do I fix royal icing that’s too runny?
If your icing feels too thin, just add more powdered sugar one spoonful at a time until it thickens. On the other hand, if it’s too stiff, add a few drops of water. Always mix slowly so you don’t incorporate air bubbles.
What’s the best way to package cookies for gifting?
Let the decorated cookies dry completely (usually 8–12 hours). Then, slip each one into a clear cellophane bag and tie with ribbon. Arrange them in cookie boxes or tins with tissue paper for a festive touch that’s perfect for sharing.
Conclusion
Baking fall royal icing cookies is more than just a seasonal activity—it’s a way to slow down, connect, and create something meaningful with the people you love. From rolling out sugar cookie dough to mixing warm autumn colors, each step brings its own kind of joy. These cookies aren’t about perfection; they’re about the memories made along the way. Whether you’re gifting them, serving them at a fall party, or simply enjoying one with a mug of cider, every bite tastes like the season. So grab your cutters, whip up some icing, and let the fun (and frosting) begin.
Print
Fall Royal Icing Cookies Recipe (Beginner-Friendly Guide)
- Total Time: 40 minutes
- Yield: 24 cookies 1x
- Diet: Vegetarian
Description
Easy fall royal icing cookies decorated with pumpkins, leaves, and acorns. Perfect for gifting or cozy fall baking with family.
Ingredients
2 1/2 cups all-purpose flour
1 cup unsalted butter, softened
1 cup sugar
1 egg
1 tsp vanilla extract
1/2 tsp baking powder
3 tbsp meringue powder
4 cups powdered sugar
6 tbsp warm water
Gel food coloring (orange, red, yellow, green)
Instructions
1. Cream butter and sugar until fluffy, then beat in egg and vanilla.
2. Mix in flour and baking powder gradually until dough forms.
3. Chill dough for 30 minutes, then roll to 1/4 inch thickness.
4. Cut into fall shapes (pumpkins, leaves, acorns).
5. Bake at 350°F (175°C) for 8-10 minutes, cool completely.
6. Whisk meringue powder, powdered sugar, and water until stiff peaks form.
7. Adjust consistency: thick for outlining, thin for flooding.
8. Color icing with autumn gel colors.
9. Pipe outlines, flood cookies, and decorate with fall designs.
10. Let cookies dry completely before serving or packaging.
Notes
Chill dough before baking to avoid spreading.
Store cookies in an airtight container for up to 2 weeks.
Allow decorated cookies to dry overnight before packaging.
- Prep Time: 30 minutes
- Cook Time: 10 minutes
- Category: Dessert
- Method: Baking
- Cuisine: American
Nutrition
- Serving Size: 1 cookie
- Calories: 150
- Sugar: 18g
- Sodium: 45mg
- Fat: 6g
- Saturated Fat: 3.5g
- Unsaturated Fat: 2g
- Trans Fat: 0g
- Carbohydrates: 22g
- Fiber: 0.5g
- Protein: 2g
- Cholesterol: 20mg