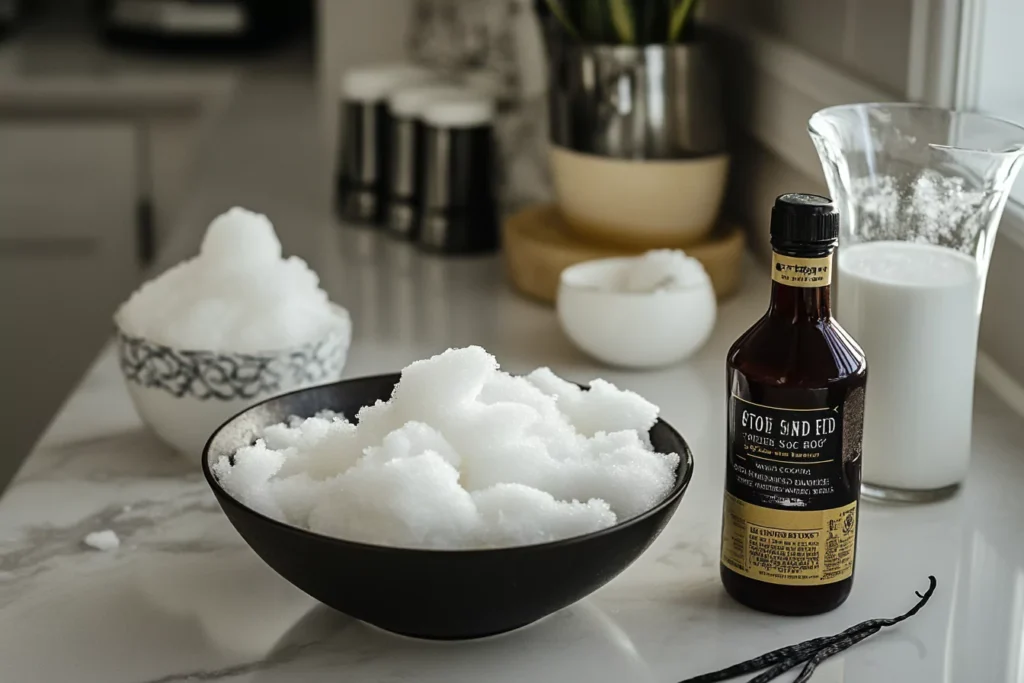
Looking for a fun and easy snow ice cream recipe? Snow ice cream is a unique and whimsical way to turn freshly fallen snow into a creamy, sweet treat. This delightful winter dessert is quick to make and perfect for snowy days when you want to enjoy a playful and delicious activity with family and friends. Not only is it a simple recipe, but it’s also endlessly customizable with different flavors and toppings.
What Is Snow Ice Cream?
Snow ice cream is a whimsical dessert that uses freshly fallen snow as its primary ingredient, mixed with a blend of milk, sugar, and vanilla extract to create a sweet, creamy treat. It’s often associated with childhood memories, bringing a sense of nostalgia and joy to those who make it. This dessert is as much about the experience as it is about the taste—perfect for snowy days when you want to turn nature’s bounty into something delicious.
The Origin of Snow Ice Cream
The exact origins of snow ice cream are hard to trace, but it is thought to have roots in regions where heavy snowfall is common. Families historically took advantage of the clean, powdery snow to create quick, no-cook desserts. The concept aligns with traditions of using natural, seasonal resources to make food, much like the creation of maple syrup candies in snow-covered areas.
Popular Variations Around the World
While the classic snow ice cream recipe is widely recognized in the United States, variations exist in other cultures. For example:
- Japanese Kakigori: Though not made from snow, this shaved ice dessert has similar textures and is flavored with syrups or condensed milk.
- Bingsu from Korea: A finer, milk-based ice treat often topped with fruits and sweet beans.
- Norwegian Snow Cream: A Scandinavian twist often involves whisked egg whites for an airy texture.
Each region offers its spin on icy, creamy desserts, but snow ice cream’s reliance on freshly fallen snow makes it truly unique.
Ingredients for Snow Ice Cream
Making snow ice cream is incredibly simple, requiring just a handful of ingredients that you likely already have in your kitchen. The beauty of this recipe is its flexibility—whether you prefer the classic version or want to add creative touches, the base ingredients remain consistent.

Essential Ingredients
To prepare traditional snow ice cream, you’ll need the following:
- Fresh Snow (4-6 cups): The star of the recipe, snow provides the light and fluffy base for the dessert. It’s important to use clean, freshly fallen snow for the best results.
- Milk (1 cup): Whole milk is typically used, but you can substitute with alternatives like almond milk, oat milk, or coconut milk for a dairy-free version.
- Granulated Sugar (1/2 cup): Sugar adds sweetness to the ice cream. You can adjust the quantity to your taste.
- Vanilla Extract (1-2 teaspoons): This adds a warm and inviting flavor to your ice cream. Pure vanilla extract is preferred for a richer taste.
Optional Add-Ons and Flavor Enhancers
Elevate your snow ice cream with these optional ingredients:
- Cocoa Powder or Chocolate Syrup: For a chocolaty twist, mix in cocoa powder or drizzle chocolate syrup on top.
- Fruit Purees or Fresh Berries: Add natural sweetness and vibrant color with pureed fruits or whole berries.
- Sprinkles and Candy Bits: Make it more fun and kid-friendly by incorporating colorful toppings.
- Condensed Milk: Replace granulated sugar with sweetened condensed milk for a creamier, richer flavor.
By keeping the base ingredients simple and versatile, you can customize your snow ice cream to suit any palate or occasion.
Tools Needed to Make Snow Ice Cream
One of the best things about making snow ice cream is that it doesn’t require any special equipment. With a few basic tools found in most kitchens, you can whip up this frosty treat in no time. Here’s what you’ll need:
Common Kitchen Tools
- Large Mixing Bowl:
Use a wide, deep bowl to collect and mix the snow. A larger bowl helps prevent spills while stirring. - Measuring Cups and Spoons:
Precise measurements are key to achieving the right balance of sweetness and creaminess in your ice cream. - Mixing Spoon or Spatula:
A sturdy spoon or silicone spatula works well for combining the ingredients without melting the snow too quickly. - Ice Cream Scoop (Optional):
For a more polished presentation, use an ice cream scoop to serve the dessert. - Serving Bowls or Cups:
Small bowls or cups make for easy portioning and serving.
Tips for Safe Snow Collection
Since snow is the primary ingredient, ensuring it’s clean and safe is essential. Follow these tips to collect the best snow for your recipe:
- Choose Fresh Snow:
Collect snow that has just fallen and is free from debris. Avoid snow that has been on the ground for too long. - Avoid the Top Layer:
Skim off the top layer of snow, as it may contain dirt or other particles from the air. Collect from areas away from foot traffic and structures. - Use a Clean Bowl or Bucket:
Ensure the container you use to collect snow is clean and food-safe. - Be Cautious of Snow Quality:
Avoid snow that has a gray or yellowish tint—always go for snow that looks white, fluffy, and pristine.
Once you’ve gathered your tools and snow, you’re ready to bring the recipe to life. With a few simple steps, you’ll transform these ingredients into a creamy and delightful dessert.
Step-by-Step Guide to Making Snow Ice Cream
Creating snow ice cream is a fun and easy process that takes just a few minutes. Follow these simple steps to prepare your sweet, frosty treat.
Prepare the Snow
- Collect Fresh Snow:
Using a clean bowl or container, gather about 4-6 cups of freshly fallen snow. Ensure the snow is light and fluffy for the best texture. - Chill the Snow (Optional):
If you’re not using the snow immediately, place it in the freezer to keep it from melting. This helps maintain the light, airy consistency needed for the ice cream.
Mix the Ingredients

- Combine Milk, Sugar, and Vanilla:
In a smaller mixing bowl, whisk together 1 cup of milk, ½ cup of granulated sugar, and 1-2 teaspoons of vanilla extract. Stir until the sugar dissolves completely. - Add the Snow:
Gradually fold the liquid mixture into the bowl of snow. Stir gently with a spoon or spatula until the ingredients are evenly combined. Be careful not to overmix, as this can make the ice cream too runny. - Adjust Consistency:
If the mixture feels too dry, add a splash of milk. If it’s too wet, mix in a little more snow until you reach your desired consistency.
Serve and Enjoy
- Scoop and Serve:
Using an ice cream scoop or spoon, portion the snow ice cream into serving bowls or cups. - Add Toppings (Optional):
Enhance your treat with toppings like chocolate syrup, sprinkles, or fresh fruit for added flavor and fun. - Enjoy Immediately:
Snow ice cream melts quickly, so serve it immediately after preparation.
Storing Snow Ice Cream
If you have leftovers (which is rare!), you can store snow ice cream in an airtight container in the freezer. Note that its texture may change after freezing, so it’s best enjoyed fresh.
Variations and Creative Twists
One of the best things about snow ice cream is its versatility. While the classic recipe is delightful on its own, adding unique flavors and textures can take it to the next level. Here are some exciting variations and creative twists to try.

Vegan Snow Ice Cream
For those who prefer a dairy-free option, it’s easy to adapt the recipe to suit your needs:
- Swap the Milk:
Use plant-based alternatives like almond milk, coconut milk, oat milk, or cashew milk. Each adds a subtle flavor that complements the snow ice cream. - Use Agave or Maple Syrup:
Replace granulated sugar with natural sweeteners like agave syrup or maple syrup for a healthier twist. - Add Vegan Toppings:
Sprinkle on coconut flakes, dark chocolate chips, or fresh fruit to enhance the dessert.
Adding Fruits and Candies
Brighten up your snow ice cream with vibrant colors and flavors by incorporating fruits and candies:
- Fresh Fruits:
Mix in diced strawberries, blueberries, or mango for a fruity kick. You can also drizzle fruit puree over the top for added flair. - Crushed Candies:
Add a sprinkle of crushed peppermint, toffee, or chocolate candies for a crunchy texture. - Marshmallow Swirls:
Fold in a dollop of marshmallow fluff or mini marshmallows for a gooey, fun addition.
Gourmet Flavors
Elevate your snow ice cream into a gourmet treat with these flavor ideas:
- Chocolate Lovers:
Stir in 1-2 tablespoons of cocoa powder or add a swirl of chocolate syrup to create a rich, chocolaty version. - Coffee Delight:
Mix a teaspoon of instant coffee granules with the milk for a coffee-infused dessert. - Citrus Twist:
Add a splash of orange, lemon, or lime juice for a refreshing, tangy flavor.
Fun with Color
If you’re serving kids or hosting a winter-themed party, consider these playful options:
- Food Coloring:
Add a few drops of food coloring to the milk mixture to create vibrant, colorful snow ice cream. - Rainbow Layers:
Make multiple batches in different colors and layer them in a glass for a stunning rainbow effect.
Serving Ideas
Get creative with presentation to make your snow ice cream extra special:
- Waffle Cones or Bowls: Serve the ice cream in edible waffle cones or bowls for a crunchy complement.
- Parfaits: Layer snow ice cream with whipped cream, fruit, and granola in a tall glass for a wintery parfait.
- Hot Chocolate Pairing: Top your ice cream with a drizzle of warm hot chocolate for a contrasting hot-and-cold treat.
These variations and creative twists make snow ice cream a dessert that can be endlessly customized to suit any taste or occasion.
Tips for the Best Snow Ice Cream
Creating snow ice cream is simple, but a few tips and tricks can help ensure the perfect balance of flavor, texture, and presentation. Here’s how to elevate your homemade snow ice cream to the next level.
Selecting the Right Type of Snow
The quality of your snow directly impacts the outcome of your ice cream. Follow these guidelines for the best results:
- Choose Fresh, Clean Snow:
Opt for snow that has just fallen and is free from debris. Avoid collecting snow from areas close to roads, buildings, or trees. - Light and Fluffy Snow Works Best:
Powdery snow is easier to mix and creates a lighter, creamier texture. Heavier, wetter snow may result in a denser dessert. - Check the Weather Conditions:
If the snow is icy or slushy, it might not yield the desired consistency. Wait for a good snowfall to ensure quality.
Balancing Sweetness and Texture
- Start Light on Sugar:
Everyone’s sweetness preference varies, so begin with a smaller amount of sugar and adjust to taste as you mix. - Avoid Overmixing:
Stir the ingredients just until combined. Overmixing can cause the snow to melt and turn the ice cream watery. - Add Snow Gradually:
If your mixture seems too runny, gradually add more snow until you reach the desired consistency.
Enhancing Flavor
- Use High-Quality Vanilla Extract:
Pure vanilla extract gives a richer, more natural flavor compared to imitation extracts. - Experiment with Extracts:
Try almond, peppermint, or coconut extract to create exciting flavor variations. - Incorporate Fresh Ingredients:
Fresh fruit, grated chocolate, or crushed nuts can enhance the flavor profile and add texture.
Serving Tips
- Serve Immediately:
Snow ice cream melts quickly, so plan to serve it right after preparation for the best experience. - Chill Your Serving Bowls:
Place bowls or cups in the freezer for a few minutes before serving. This helps keep the ice cream cold longer. - Use Decorative Toppings:
Sprinkles, chocolate shavings, or a drizzle of honey can make your snow ice cream visually appealing and extra delicious.
By following these tips, you can ensure your snow ice cream turns out perfectly every time, delighting your taste buds and impressing your family and friends.
FAQs About Snow Ice Cream
Making snow ice cream often raises questions, especially for those trying it for the first time. Here are answers to some of the most common inquiries to ensure a fun and safe experience.
Can I Use Any Type of Snow?
Not all snow is suitable for making snow ice cream. Here’s what you need to know:
- Fresh Snow Only: Use clean, freshly fallen snow that is white and fluffy. Avoid snow that has been sitting for long periods, as it may collect dirt and debris.
- Safe Locations: Gather snow from open spaces, away from roads or areas with heavy pollution. Always avoid snow with a grayish or yellow tint.
How Long Does Snow Ice Cream Last?
Snow ice cream is best enjoyed immediately after it’s made. However, if you have leftovers:
- Short-Term Storage: Place the ice cream in an airtight container and freeze it for up to 24 hours.
- Texture Changes: Be aware that the texture may harden and become less fluffy after freezing. Let it thaw for a few minutes and stir before serving.
Is It Safe to Eat Snow?
In most cases, eating freshly fallen snow is safe, but here are some precautions:
- Avoid the First Snowfall: The initial snow of the season may contain airborne pollutants. Wait for a later snowfall for a cleaner option.
- Check Local Conditions: If you live in an area with heavy industrial activity or pollution, it’s best to avoid using snow for recipes.
Can I Make Snow Ice Cream Without Milk?
Yes! There are several dairy-free alternatives for making snow ice cream:
- Plant-Based Milks: Use almond, soy, oat, or coconut milk for a creamy, lactose-free version.
- Juices or Purees: Try orange juice, lemonade, or fruit puree for a refreshing, sorbet-like variation.
What Are Some Unique Flavor Ideas?
Get creative with flavors to make your snow ice cream stand out:
- Mint Chocolate Chip: Add peppermint extract and sprinkle in chocolate chips.
- Caramel Delight: Swirl in caramel sauce and top with sea salt.
- Berry Bliss: Blend in pureed raspberries or blackberries for a fruity twist.
What Should I Do If I Don’t Have Snow?
If you’re craving snow ice cream but don’t have access to fresh snow:
- Crushed Ice Alternative: Use finely crushed ice as a substitute for snow.
- Shaved Ice Machines: Machines designed for shaved ice can also replicate the texture of snow.
These FAQs cover the essentials for making snow ice cream a safe, fun, and tasty experience. Whether it’s your first time or you’re experimenting with new ideas, the answers above should guide you to success.
Conclusion
Snow ice cream is more than just a dessert—it’s a delightful way to celebrate winter’s beauty and transform freshly fallen snow into a sweet, creamy treat. With its simple ingredients, easy preparation, and endless customization options, it’s perfect for snowy days and a great way to make memories with family and friends. Whether you stick to the classic recipe or experiment with exciting flavors, snow ice cream is sure to bring smiles all around.
If you’re looking for another cozy, seasonal recipe to enjoy on chilly days, try this Pumpkin Spice Chai Latte recipe from Elysium Recipes. It pairs beautifully with your homemade snow ice cream, creating the ultimate winter indulgence. Happy scooping and sipping!
Print
Snow Ice Cream Recipe
- Total Time: 5 minutes
- Yield: 4 servings 1x
- Diet: Gluten Free
Description
Turn freshly fallen snow into a creamy, sweet treat with this quick and fun snow ice cream recipe! Perfect for winter days with family and friends.
Ingredients
Base Ingredients
- 4–6 cups fresh, clean snow
- 1 cup milk (or plant-based alternative)
- ½ cup granulated sugar
- 1–2 tsp vanilla extract
Optional Add-Ins
- 2 tbsp cocoa powder (for chocolate snow ice cream)
- ½ cup fruit puree or fresh berries
- Chocolate syrup, sprinkles, or candy bits for topping
- ½ cup sweetened condensed milk (for a creamier texture)
Instructions
Collect Fresh Snow
- Gather clean, freshly fallen snow in a large mixing bowl.
- If not using immediately, store it in the freezer to keep it fluffy.
Prepare the Sweet Mixture
- In a small bowl, whisk together milk, sugar, and vanilla extract until the sugar dissolves.
Mix the Ice Cream
- Gradually pour the milk mixture over the snow.
- Gently stir with a spoon or spatula until well combined.
- Adjust consistency by adding more snow if too runny, or a splash of milk if too dry.
Serve & Enjoy!
- Scoop the snow ice cream into bowls or cones.
- Add your favorite toppings and serve immediately.
Notes
- For Vegan/Dairy-Free: Use almond, coconut, or oat milk and maple syrup instead of sugar.
- For a Softer Texture: Replace sugar with sweetened condensed milk for extra creaminess.
- For a Fruity Twist: Blend in mashed bananas, strawberries, or mango for natural sweetness.
- Make It Colorful: Add a few drops of food coloring for a fun look.
- Prep Time: 5 minutes
- Cook Time: none
- Category: Dessert
- Method: No-Bake
- Cuisine: American, Winter Treat
Nutrition
- Serving Size: Per Serving - Without Toppings
- Calories: 140 kcal
- Sugar: 25g
- Fat: 3g
- Carbohydrates: 30g
- Fiber: 0g
- Protein: 2g


1 thought on “Snow Ice Cream Recipe – A Fun Winter Treat”